Hyderabadi Murg Dum Biryani (Kacchi Style)
Hey everyone, it's Jim, welcome to our recipe site. Today, I'm gonna show you how to make a special dish, Hyderabadi Murg Dum Biryani (Kacchi Style). One of my favorites food recipes. This time, I will make it a little bit unique. This will be really delicious.
Hyderabadi Murg Dum Biryani (Kacchi Style) is one of the most well liked of current trending foods on earth. It's appreciated by millions every day. It is simple, it's quick, it tastes yummy. Hyderabadi Murg Dum Biryani (Kacchi Style) is something which I have loved my entire life. They're fine and they look fantastic.
Many things affect the quality of taste from Hyderabadi Murg Dum Biryani (Kacchi Style), starting from the type of ingredients, then the selection of fresh ingredients, the ability to cut dishes to how to make and serve them. Don't worry if you want to prepare Hyderabadi Murg Dum Biryani (Kacchi Style) delicious at home, because if you already know the trick then this dish can be used as an extraordinary special treat.
As for the number of servings that can be served to make Hyderabadi Murg Dum Biryani (Kacchi Style) is 10-12 servings. So make sure this portion is enough to serve for yourself and your beloved family.
Just in addition, the time it takes to cook Hyderabadi Murg Dum Biryani (Kacchi Style) estimated approx 35 min.
To get started with this recipe, we must prepare a few ingredients. You can have Hyderabadi Murg Dum Biryani (Kacchi Style) using 42 ingredients and 26 steps. Here is how you cook it.
#reststyle
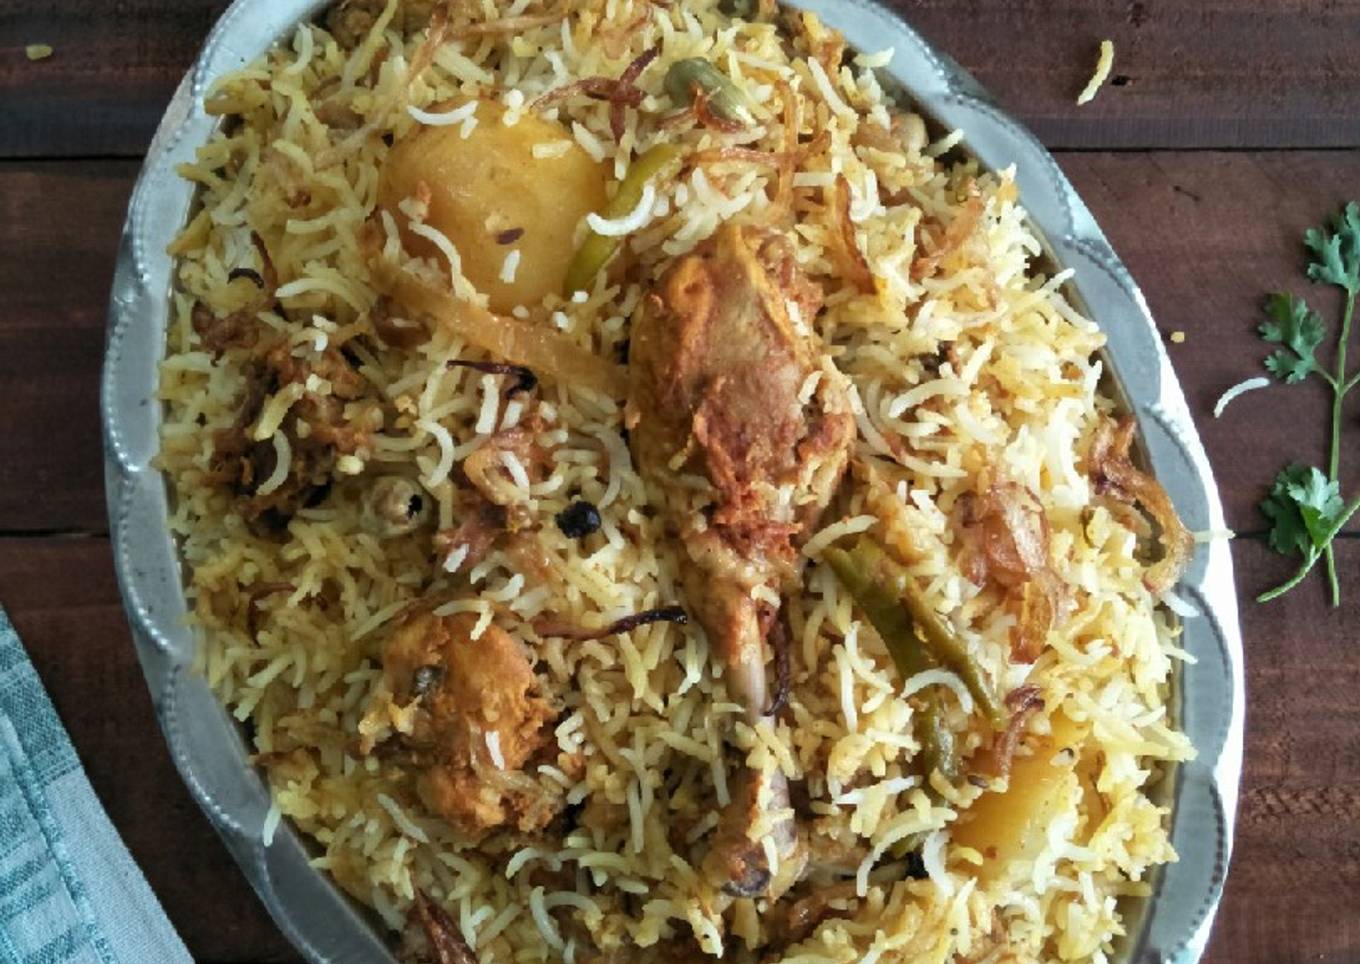
Hyderabadi biryanis are subtle in taste and totally delicious! Hyderabadi Murg Dum Biryani in kacchi style is one such absolutely flavourful biryani.
Biryani is prepared in two ways, one where the meat is fully cooked before dum which is called akhni ki biryani and the other where the meat is just marinated overnight and used raw in the dum process which is called kacchi ki biryani. The rice to be used in this case is presoaked and half cooked.
Here I have presented the kacchi ki biryani which actually tastes absolutely delicious and subtle. I have always loved this type of biryani and just recently after I had the opportunity to taste such a biryani at a particular restaurant, I was dying to try it out.
Well, it turned out just as I had expected and is one of the best among all the biryanis I have prepared till date. Still, this depends on personal choice, as my family feels that all the other ones I have prepared till date are equally delicious!
Ingredients and spices that need to be Prepare to make Hyderabadi Murg Dum Biryani (Kacchi Style):
- 1 kg Chicken (With Bone)
- 6 Potatoes …. Optional
- 10 Medium Onions …. Thinly sliced
- Oil As Required For Frying The Onions
- 1/4 cup Mint Leaves…. Roughly torn
- 4 tbs Ghee
- 3-4 drops Kewra Essence
- 1 cup Milk
- 1/2 tsp Saffron strands
- Whole Wheat Flour as required for making the dough
- For The Marinade :
- 2 1/2 cups Fresh Homemade Curds
- 1 1/2 cup Fried Onions
- 3 tsp Ginger Garlic Paste
- 3 Spicy Green Chillies…. Slit lengthwise
- 1 tsp Turmeric Powder
- 1 tsp Spicy Red Chilli Powder
- 1 tsp Kashmiri Red Chilli Powder
- 2 tsp Coriander Powder
- 1 tsp Cumin Powder
- 2 tsp Garam Masala Powder
- 1/2 cup Mint Leaves… Roughly torn
- 1/2 cup Coriander Leaves… Chopped
- 3 tsp Salt.... Approx
- For The Rice :
- 7 cups Raw Basmati Rice
- 4.5 ltr Water
- 4 Cloves
- 4 sticks Cinnamon (1″each)
- 4 Green Cardamoms
- 4 Black Peppercorns
- 1 tsp Cumin Seeds
- 4 tsp Salt
- For The Tempering :
- 1 cup Oil
- 4 CLoves
- 4 sticks Cinnamon (1″ each)
- 3 Green Cardamoms
- 2 Black Cardamoms
- 6 Black Peppercorns
- 1/2 Mace
- 4 Bay Leaves (Tej patta/tamalpatra)
Instructions to make to make Hyderabadi Murg Dum Biryani (Kacchi Style)
- To make the Hyderabadi Murg Dum Biryani in Kacchi Style, we first need to prepare the chicken for dum.
- Wash the chicken thoroughly and drain out all the water. Cut into medium sized pieces and transfer to a mixing bowl.
- Add to it all the ingredients mentioned for the marinade and give it a good rub.
- Now, either the chicken can be marinated overnight and stored in the refrigerator in which case the fried onions should be added the next day, some time before cooking, or it can be marinated 2-3 hours before cooking where the fried onions can be added at the same time.
- Heat the milk and add the saffron strands to it and set aside to cool.
- The next step would be preparing the rice for the biryani. Rinse the basmati rice grains twice under clean water and soak in sufficient water for about half an hour.
- Boil the above mentioned quantity of water for cooking the rice and add all the whole spices and salt to it.
- When the water starts boiling, drain the soaked rice grains and add them to the water alongwith the lemon juice.
- Keep the flame high and give it a good stir.
- Once the water starts boiling again, reduce the heat to medium so that there is a slight boil to the water.
- Check the rice within about 2-3 minutes. If the rice is about 70% cooked, i.e. on smashing the grain with our fingers if the rice splits into two and we see a slight uncooked grain within, it is the right time to drain it from the boiling water.
- Set the drained rice aside till further use.
- In the meantime start deep frying the sliced onions in batches to get birista, adding a pinch of salt each time to hasten the browning and to make the onions a bit crispier.
- Drain the onions from the oil as soon as they turn slightly golden brown.
- Peel the potatoes and cut them into two halves. Fry them in the same oil for about 3-4 minutes, after all the onions are done. Drain and set aside.
- Next, place a flat iron griddle on the stove top and start heating it on low flame, for the dum.
- At the same time, to assemble the biryani, heat a heavy bottomed pan and add the oil for tempering to it.
- When it heats up, add the mentioned whole spices to it.
- As soon as they splutter, add the half fried potatoes and the marinated chicken alongwith all the marinade and mix, Immediately turn off the heat.
- Spread all the cooked rice over this chicken mixture so as to cover the chicken completely.
- Top with ghee and roughly torn mint leaves and the kewra essence. Spread the remaining birista over the rice.
- With the handle of a ladle, make four vertical holes in the rice and pour the saffron milk equally into them. Seal the holes lightly with the rice.
- Place a tight lid over the pan and seal all edges with a roll of kneaded dough (Made from the flour).
- Place this pan over the hot griddle for the dum, keeping the flame high for the first 5 minute and then on low for about 30 minutes more.
- After the said time switch off the flame and keep the pan covered as it is for at least about 15-20 minutes. Open the lid and give it a light mix.
- Serve this delicious Hyderabadi Murg Dum Biryani in Kacchi Style with some raita and an onion tomato salad by the side!
As your experience as well as self-confidence expands, you will find that you have more natural control over your diet plan as well as adapt your diet plan to your individual tastes in time. Whether you wish to serve a dish that uses less or more active ingredients or is a little essentially hot, you can make basic adjustments to accomplish this objective. To put it simply, start making your recipes on schedule. As for standard cooking skills for newbies you don't need to discover them however just if you grasp some simple food preparation strategies.
This isn't a full guide to fast and very easy lunch recipes however its great something to chew on. Ideally this will certainly get your innovative juices moving so you can prepare scrumptious dishes for your household without doing way too many square meals on your journey.
So that is going to wrap this up with this exceptional food How to Prepare Favorite Hyderabadi Murg Dum Biryani (Kacchi Style). Thank you very much for your time. I'm confident that you can make this at home. There is gonna be more interesting food at home recipes coming up. Don't forget to bookmark this page on your browser, and share it to your family, friends and colleague. Thank you for reading. Go on get cooking!


Comments
Post a Comment